Overview
In order to select options as part of a reservation, the option templates must be connected to the desired session by scheduling them.
When you wish to add a single option template to multiple sessions at once, the easiest way to accomplish this is through Session Options in the Scheduling menu. This same tool can be used to remove a session option as well.
Adding a Single Option
When you wish to add a single option template to multiple sessions at once, the easiest way to accomplish this is through Session Options in the Scheduling menu. This same tool can be used to remove a session option as well.
- From the Main menu, select Scheduling then select the Session Options.
- Select Schedule new session options from the list, click next.
- Select Option Master template from the dropdown menu, click Next.
- Option Settings: Review and adjust any of the option template's flexible settings.
- Click Next.
- Add Options to Sessions: UltraCamp will display all upcoming sessions which do not currently have this option attached. Check the box next to any sessions that should have this option added.
- Click Next.
- Confirm your selections on the summary page and click the Add Options.
Session Options Terms and Settings
Below is a detailed description of each of the settings in Adding a Single Option:
Basic Option Settings
- Option Name and Category are fixed settings, they are here for reference but cannot be edited.
- Sub Category listed on the option template will display by default here. You can change this flexible setting by typing in the field provided.
- Non-refundable Fee and Cost default will display and can be adjusted using the designated fields.
Tip
The Non-refundable Fee and the Cost will combine to calculate the total fees for this option. Whenever a reservation or option is cancelled or removed, the Non-refundable Fee will automatically be kept on the account.
- Availability Limit can be adjusted the from the template default by entering a different number in the appropriate field.
Advanced Option Settings
- Option Pricing Structure: If this has been created and you wish to add it to this option as you schedule it, select the structure from the dropdown menu. This will not appear if no structure has been created.
- Alternate Price Description: Entering here will cause it to display in place of the total fees (Non-refundable Fee + Cost) during the registration process.
- Cancellation Fee: In addition or as an alternative to the Non-refundable Fee, a Cancellation Fee can be added automatically to an account if an option is removed or cancelled.
- Cancellations Fees can also be set to only trigger if the option is cancelled after a specific date as set using the calendar and time pickers.
- Cancellation Fee Message: If set, it will appear to the client when they attempt to cancel the option.
- Setting an Expiration Date: Option will no longer be available for selection by clients after the time and date designated.
- Option Begin/End Date indicates when the option starts and when it ends. Clients will no longer be able to select an option after its end date.
- Visible to Public: An option can be made Visible to Public by checking the appropriate box. The default behavior is derived from the option template but can be overridden here.
- Confirmation Note: When this option is selected as part of registration, a Confirmation Note can be added to the automated confirmation email if the desired text is entered in the designated field.
- Collect at Registration: If a portion of the fees for this option need to be Collected at Registration, enter the amount in the field provided.
- Fees collected for this option will allocate based on the session or this option's category if an allocation account is set there.
- However, both of these can be overridden by selecting an Allocation Account on the option itself. This will also override any default on the Option Template.
- Option Documents may be attached by checking the box next to the desired document. Any checked document will be included with the confirmation email if this option is selected.
Adding Multiple Options
Adding more than one option to a session is most efficiently done through the Session Editing Wizard.
-
- From your homepage click on View Summary of Sessions or click on My Sessions and go to Summary of Sessions.
- Click the Edit icon to the right of the session you wish to edit.
- In the Session Editing Wizard, toggle Additional Information located on the left.
- Click on the Session Options link.
- Click on Add Session Options and select the options you wish to add.
- Scroll to bottom and click on Add Options.
- Click Complete.
Tip
You can edit options that have already been added by clicking on the option name. In the resulting popup window, you can adjust any option flexible settings and save your changes.
Note
Once you've scheduled an option you may want to change its settings. Options have two kinds of settings:
-
- Fixed Settings are added and adjusted only on the Option Template. They affect every use of this option template.
- Flexible Settings derive their default from the Option Template but can be changed on each unique scheduled instance.
Once you schedule an option, Flexible Settings must usually must be changed in the Session Editing wizard or through the Bulk Updates tool. They are no longer controlled by the Option Template.
Bulk Assigning Session Options
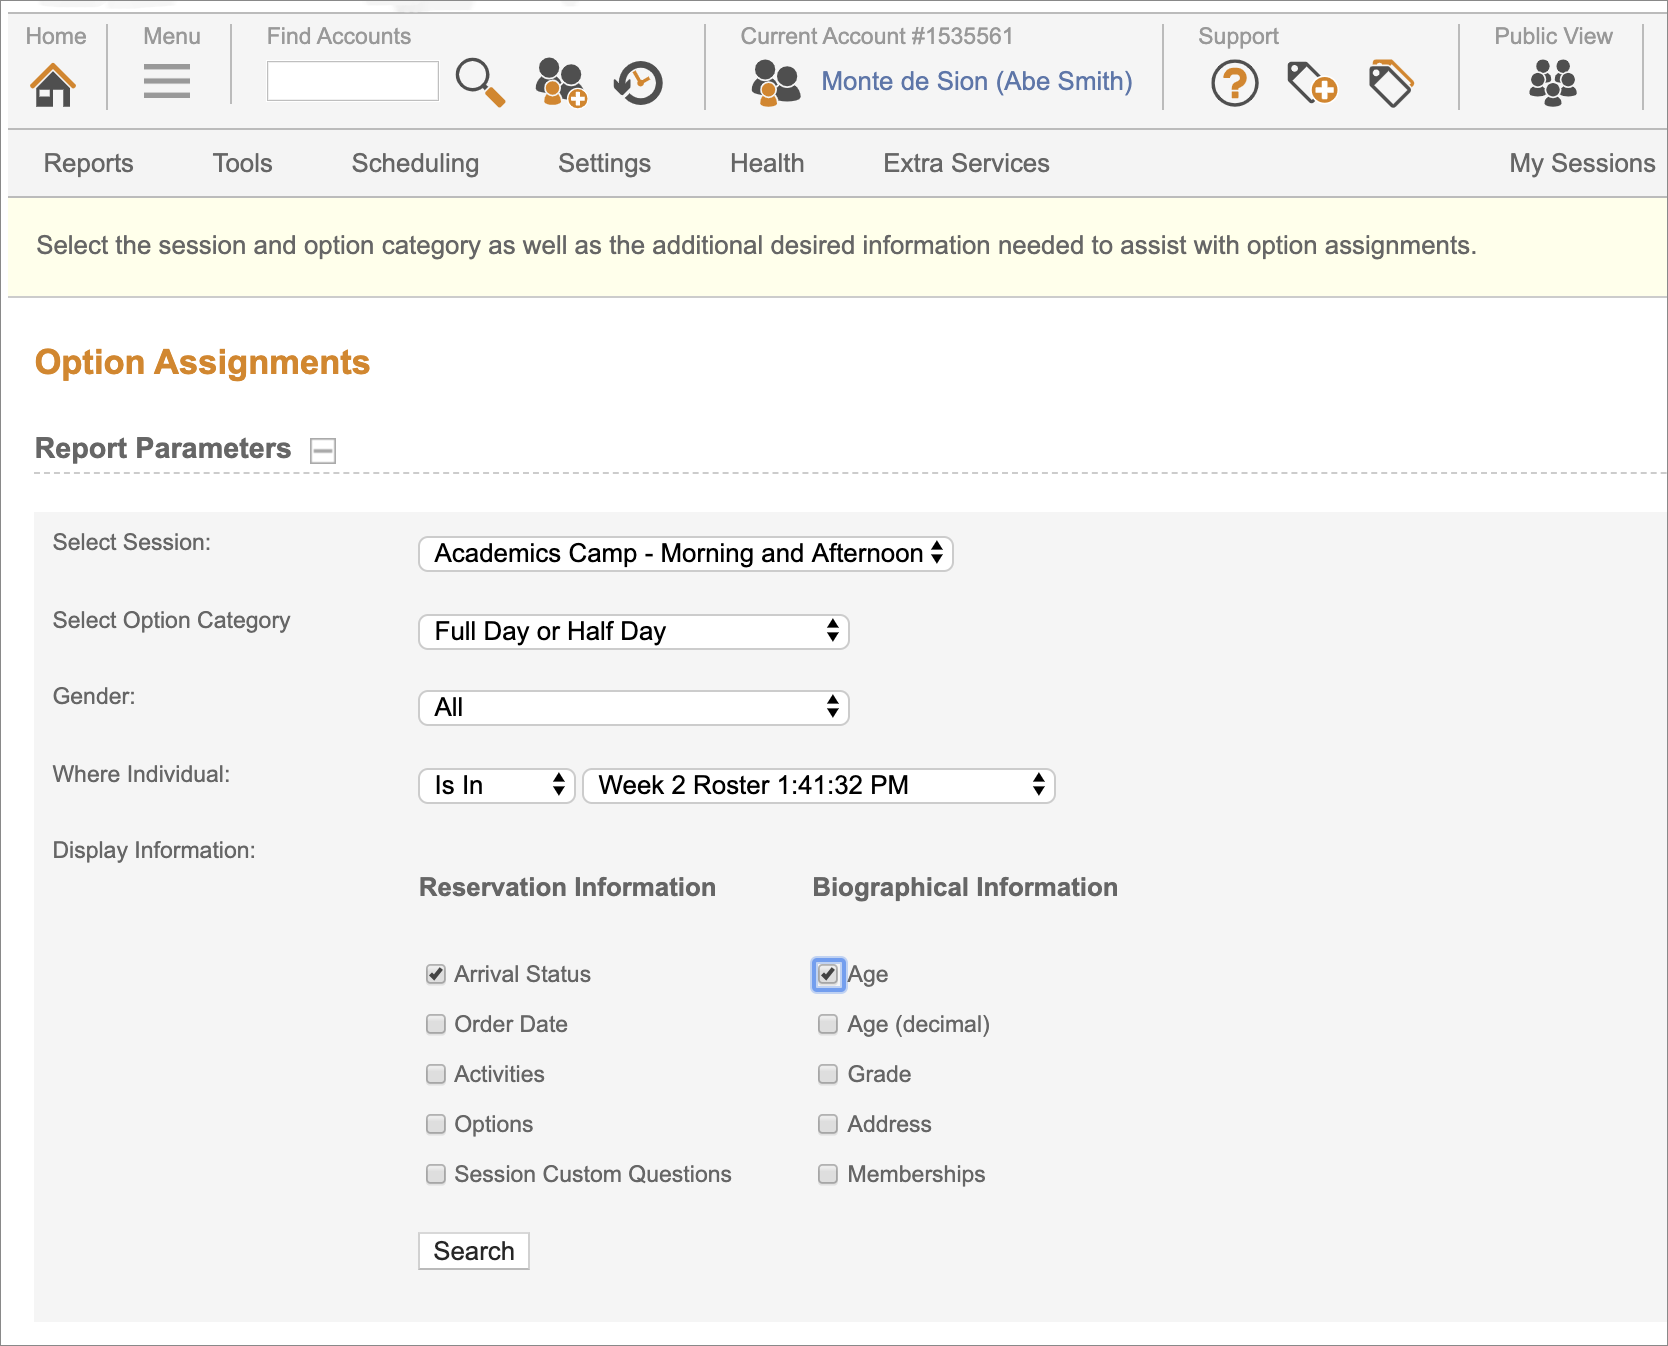
With this admin tool, you can assign options to multiple individuals at once.
-
- Click on Scheduling.
- Expand Session Options.
- Click Bulk Session Option Assignments.
Delete Options Overview
There are two ways to delete options from sessions:
- Delete an option from single or multiple sessions through the Session Options link in Scheduling.
- Delete a single option from the Session Editing Wizard.
Note
Unscheduling a session option will also remove any orders for that option and automatically adjust the reservation balance and reallocate any payments made on those options.
Delete Scheduled Option from Multiple Sessions
-
- Go to the Scheduling menu.
- Expand Session Options.
- Click on Session Options link.
- Select Remove options that are already scheduled and click Next.
- Select the Option Master from the dropdown menu, click Next.
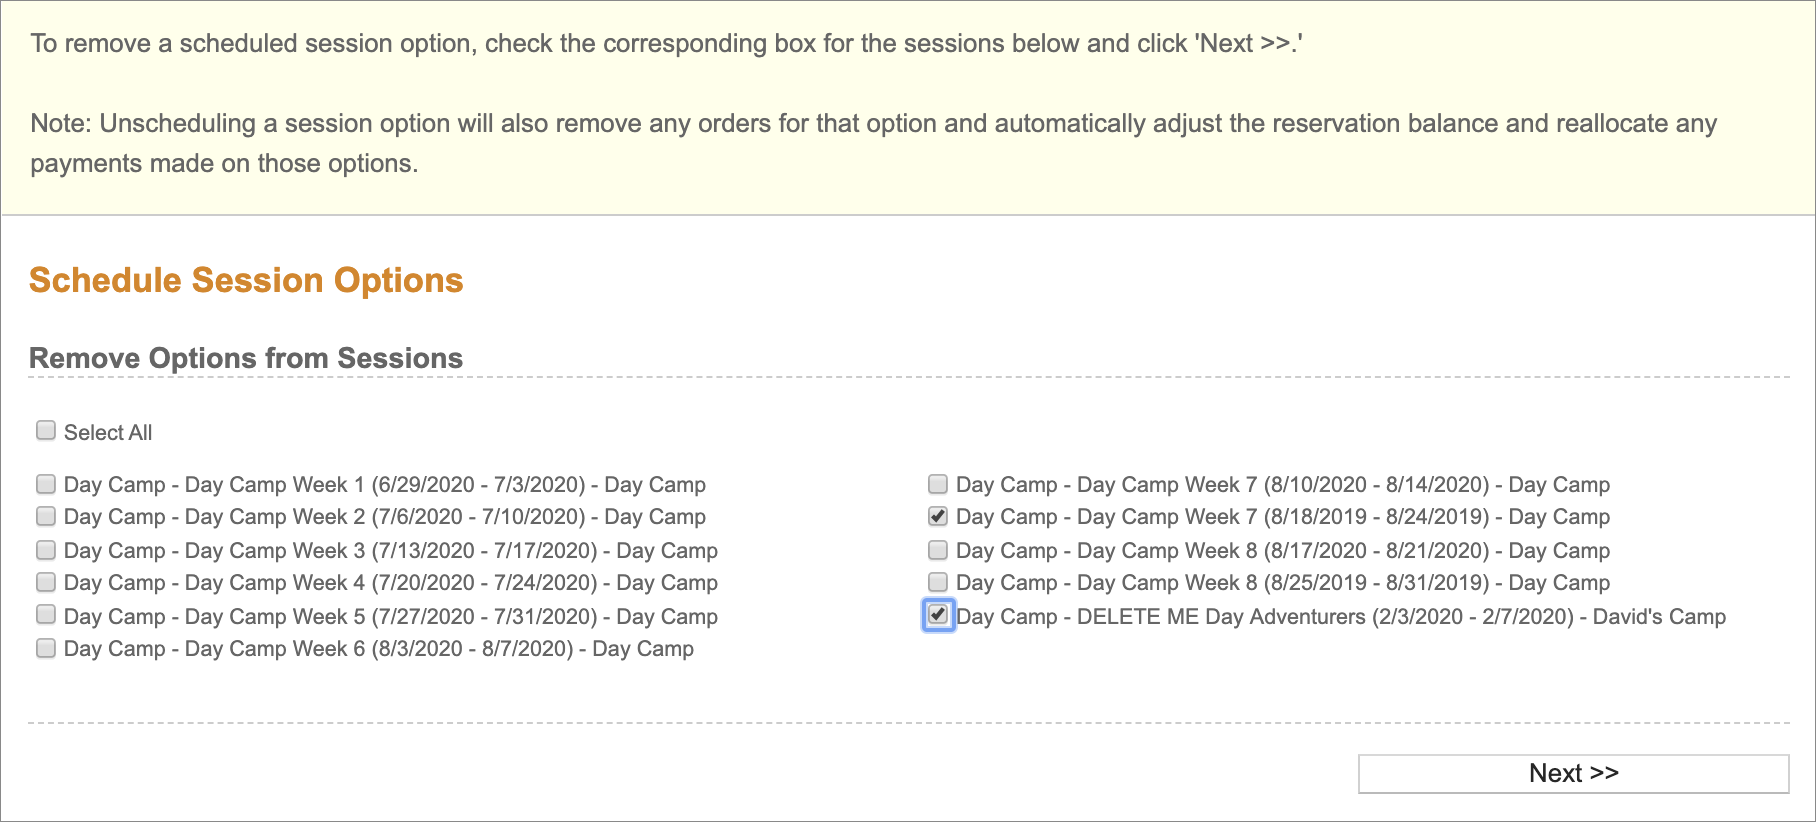
- Check the corresponding box for the sessions listed, click Next.
- You can select single or multiple sessions.
-
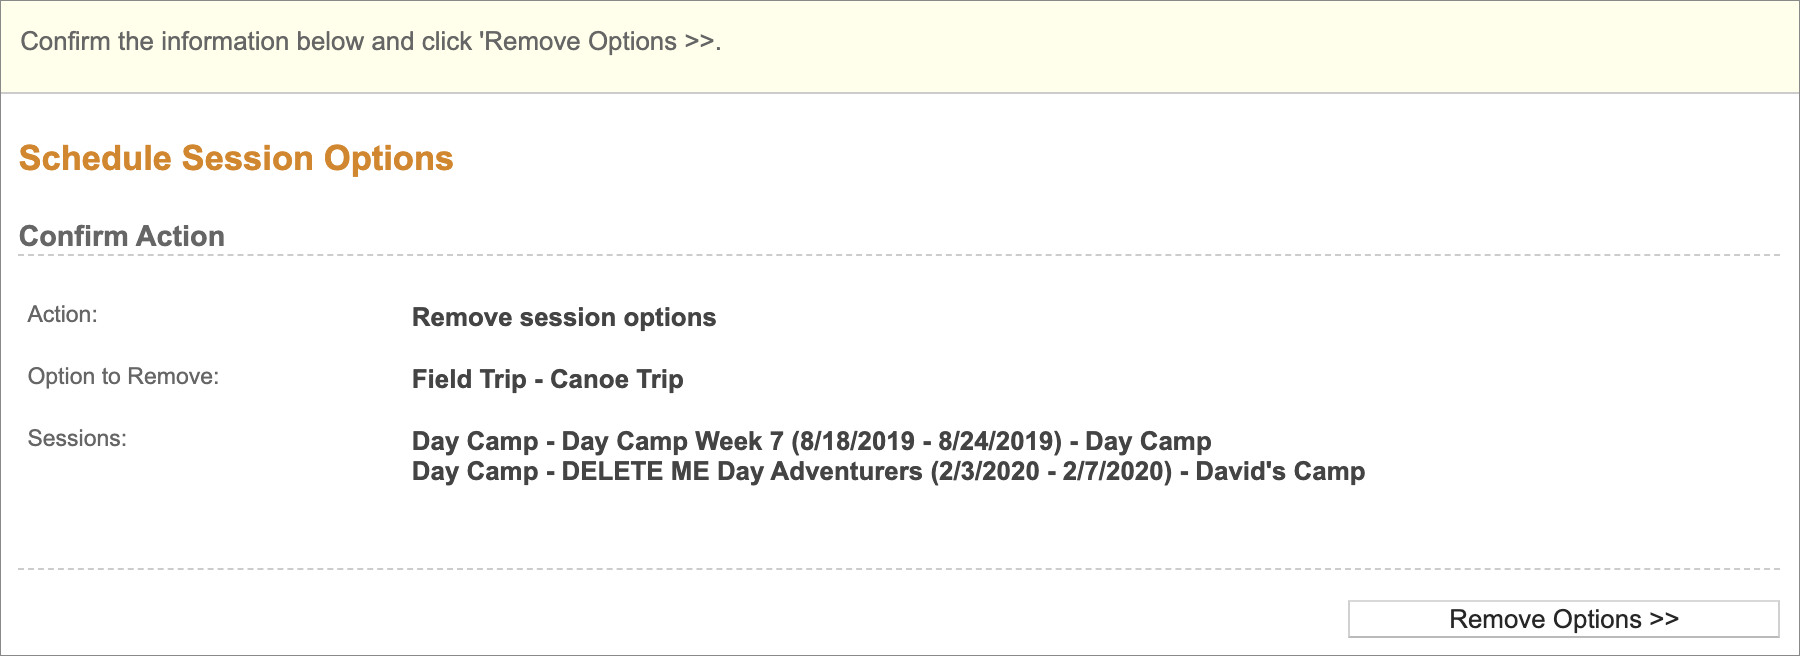
- Confirm option and which session(s) it will be removed from.
-
- Click Remove Options.
- Click Ok on the confirmation window.
Delete Option from the Session Editing Wizard
-
- Click on My Sessions.
- Select the session you wish to edit by clicking the edit icon, this takes you to the Session Editing Wizard.
- From Progress Check List, expand Additional Options.
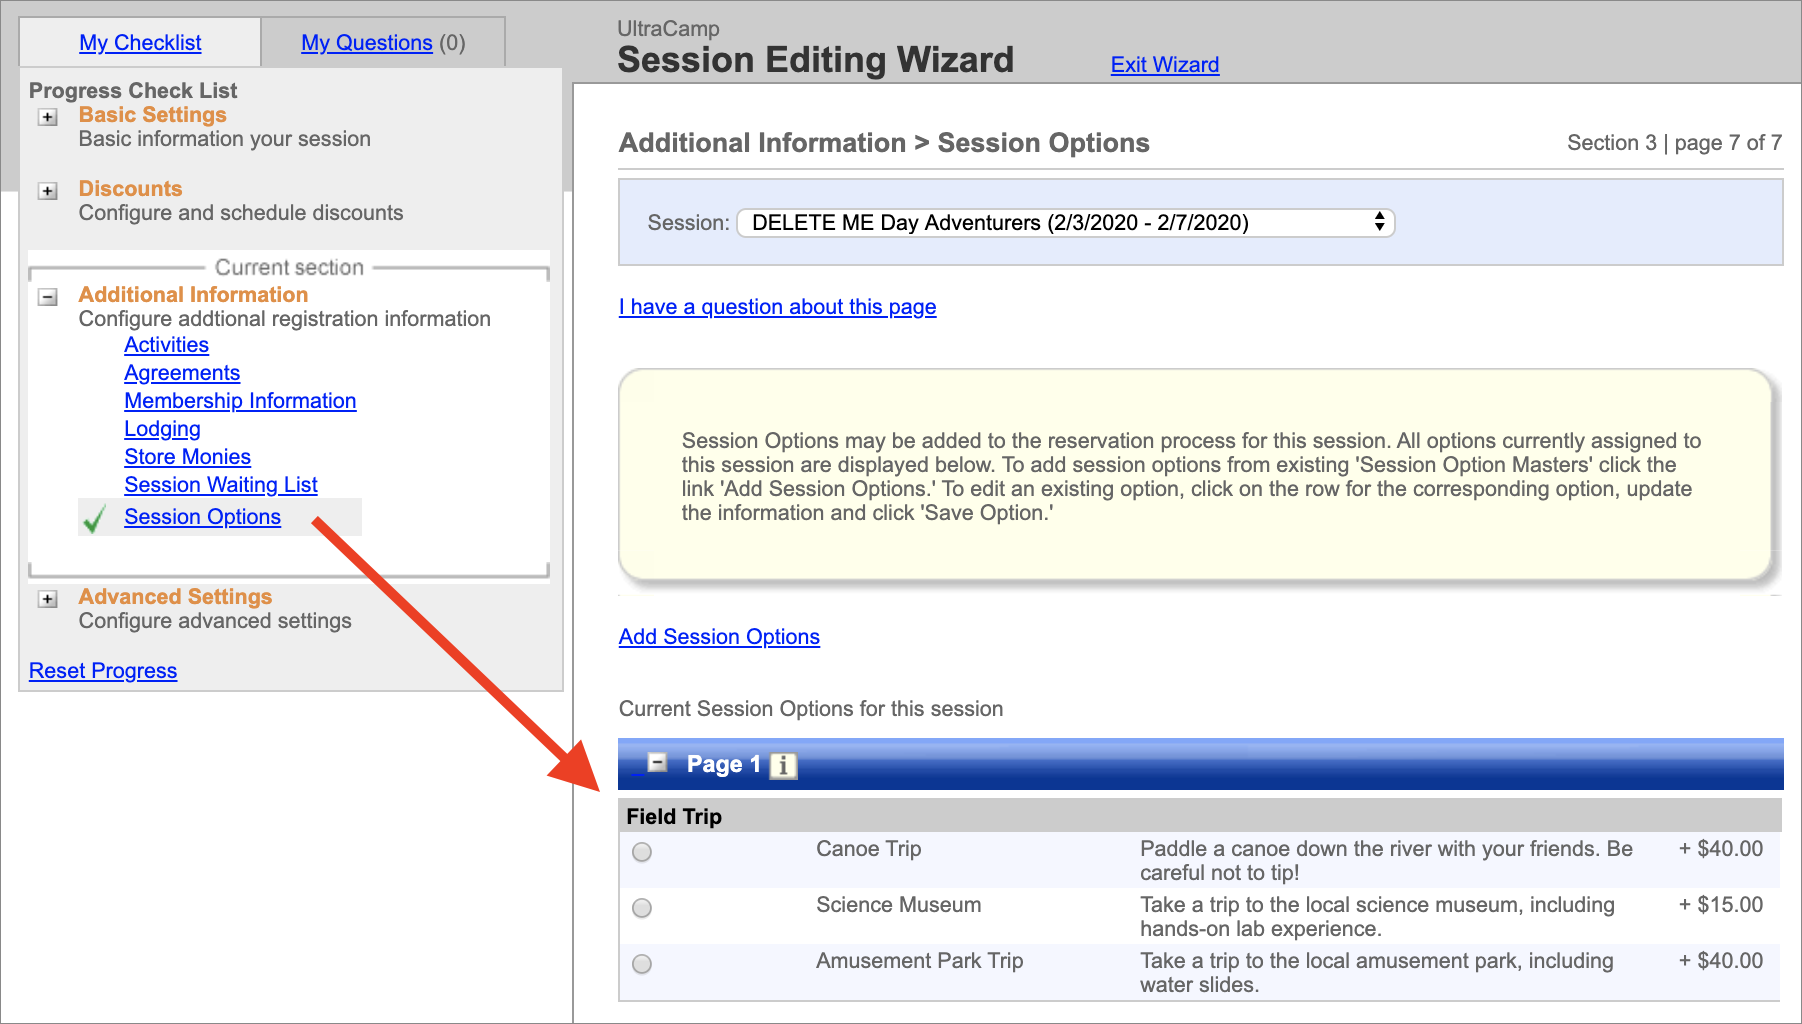
- Select Session Options.
- Click on the option you want to delete from the list of Current Session Options for this session.
-
- In the pop-up window, scroll down to the bottom and click Delete this Option.
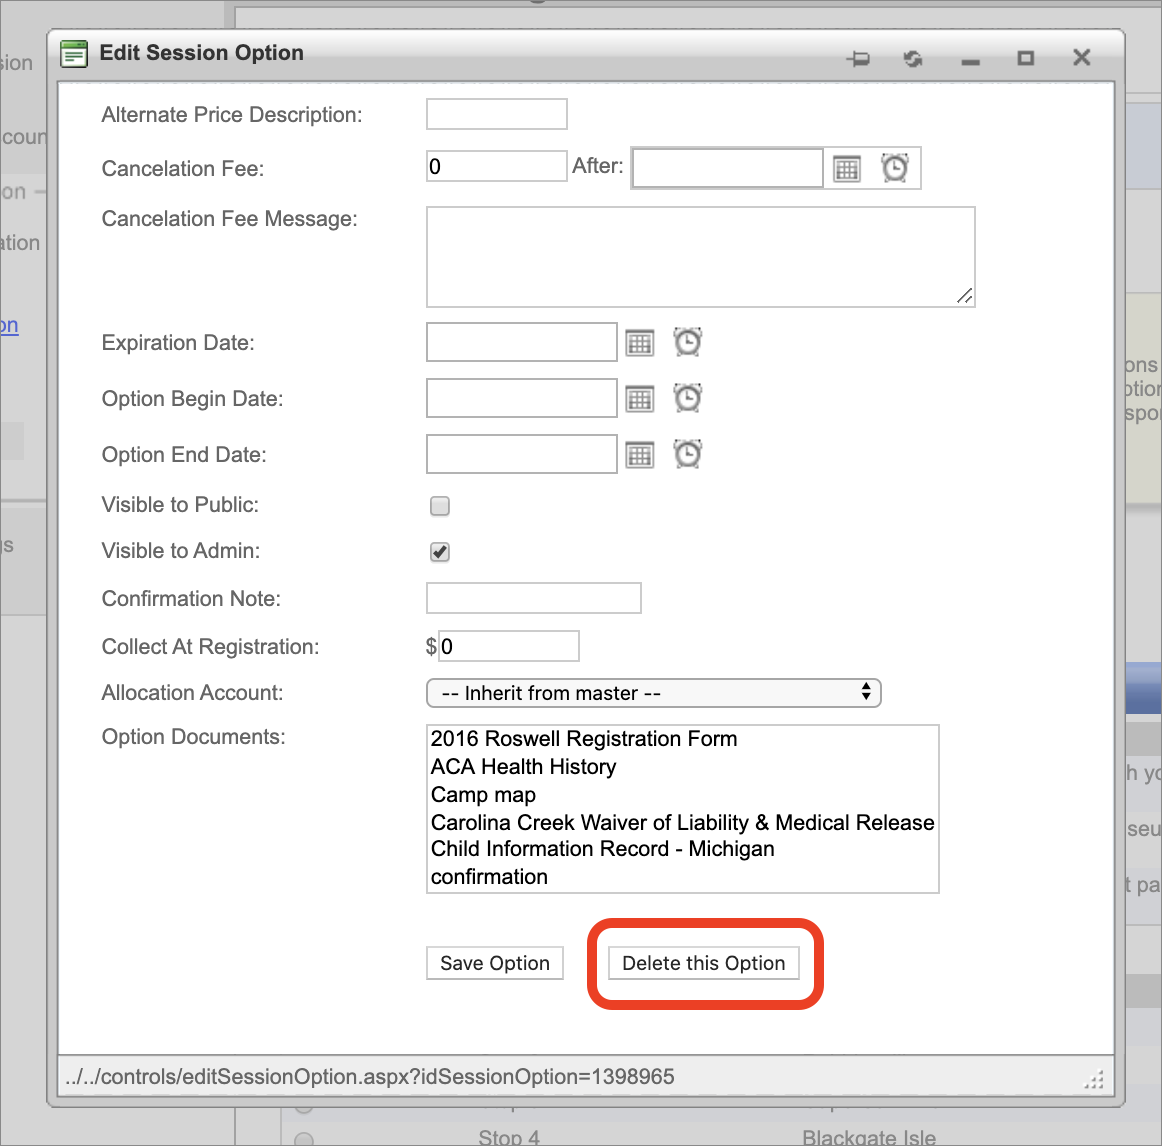
-
- Click OK in the confirmation window.
Comments
Please sign in to leave a comment.