Uploading transactions is an advanced feature in UltraCamp.
Note
Before attempting this for the first time, it is recommended that you consult with an UltraCamp Support Specialist.
Step 1: Prepare the CSV file
To upload transactions to UltraCamp, a CSV file is required. This can be generated outside of UltraCamp or by downloading an UltraCamp report.
- You must change the name of the worksheet tab in the CSV file to Sheet1
- Only the first tab will be read by UltraCamp
- Each column must have a column header (no special characters).
- A column in the CSV file must contain transaction amounts without special characters (no $ or - symbols)
- Additional recommended columns:
- idAccount - to accurately link transactions to an UltraCamp account
- transactionDate - when this transaction should show as having occurred
- transactionMemo - to provide better reporting and identification (for example, "Offline Bulk Check Upload from 1/13/2021")
- The CSV file should have a short, recognizable name without special characters or spaces
Tip
If you include a column with the idSession Assignment, UltraCamp will attempt to allocate the payment to that specific session's fees in Step 2!
Step 2: Upload the CSV file
- Go to the Tools menu and expand Financial
- Select Upload a Transaction File
- Use the button next to Select File to choose the CSV file on your computer from Step 1
- Click the Upload File button
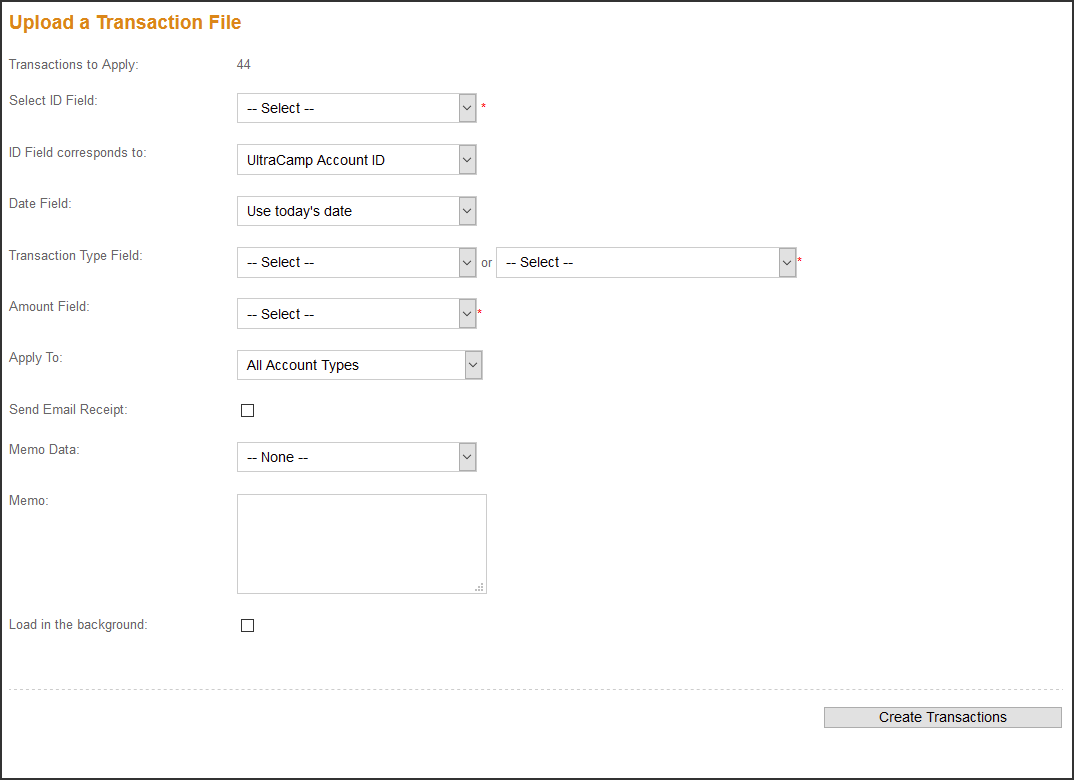
- On the resulting page (See image below), make the following setting adjustments:
- In the Select ID Field, choose idAccount
- ID Field corresponds to the UltraCamp Account ID
- In the Transaction Type Field use the second column to select the desired Transaction Type from the dropdown menu
- In the Amount Field use the dropdown menu to select the column header from the excel file for the transaction amount
- [Optional but recommended] Check the box to "Load in the background"
- Click the Create Transactions button
Comments
Please sign in to leave a comment.